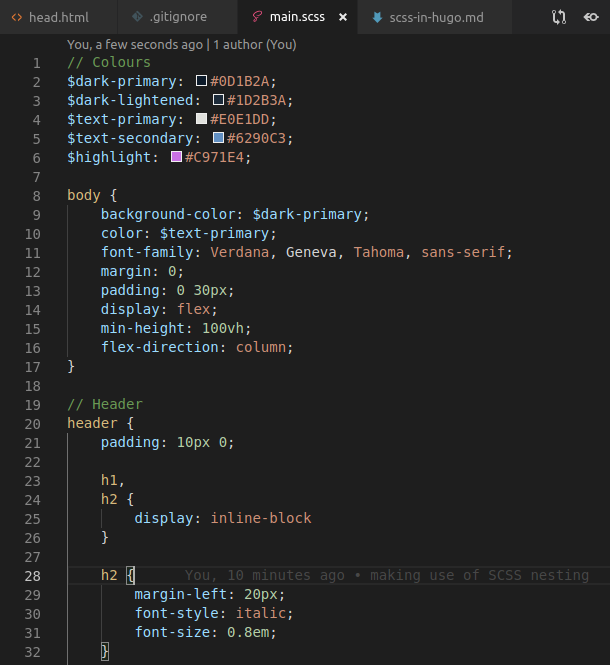
SCSS (“Sassy CSS”) is a superset of CSS3 that allows for some real time-saving and simplifying features:
Variables!
$primary-color: #0D1B2A;
$secondary-color: #6290C3;
$primary-text: #E0E1DD;

body {
    background-color: $primary-color;
    color: $secondary-color;
}
Nesting!
heading {
    h1 { // will select "heading h1"
        color: $secondary-color;
        &.special { // will select "heading h1.special"
            font-size: 2em;
        }
    }

    a { // will select "heading a"
        color: #00FF00;
    }
}
Imports!
@import 'theme'

body {
    background-color: $theme-primary; // defined in theme.scss
}
Math operators!
.header-image {
    width: 300 px / 1200 px * 100% - 20px;
}
And a bunch of other cool things.
This allows for much more sensible and easy-to-grok stylesheets, and makes restyling a website much less arduous.
To use SCSS with Hugo, we need to preprocess the SCSS file and turn it into a CSS file that will be recognised by the browser.
Hugo Pipes
Hugo Pipes allow you to create pipelines to process assets. Turning .scss files into .css is a perfect use case for this and makes it very easy.
Caveat: in order to use the toCSS pipe, you’ll need to be running the “Extended” version of Hugo. If you prefer to use PostCSS over Sass, you’ll be okay with the standard version of Hugo.
We just use the resources.ToCSS pipe, in the head section of our page template like so:
{{ $styles := resources.Get "scss/main.scss" | toCSS}}
<link rel="stylesheet" href="{{ $styles.Permalink }}">
resources.Get will look for resource files in the assets top-level folder by default, so we can start by just moving our original CSS file and changing the extension:
mkdir -p assets/scss
mv static/css/main.css assets/scss/main.scss
Hugo will process the SCSS file (with some intermediate files output in the resources folder, so add that to your .gitignore) and the Permalink property will make sure the href to our final stylesheet is correct.
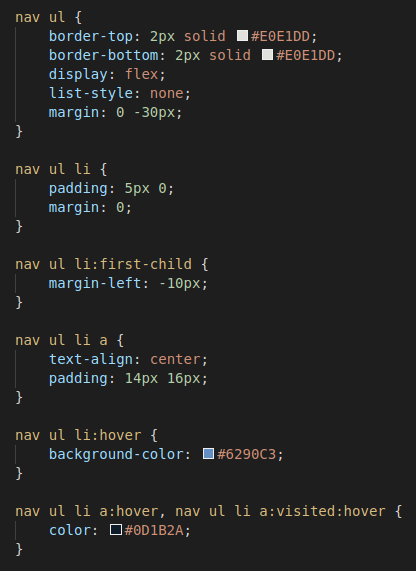
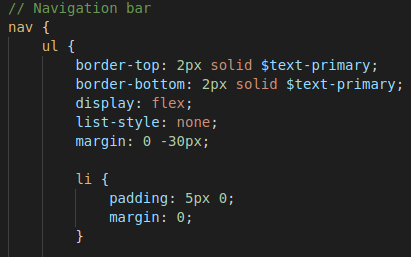
Now that it’s working (which we know because the website still has all the same styling), we can make use of some SCSS features: Nesting saves a lot of repetition, and makes the organisation of styles a bit easier to grok.
Before
 After
After
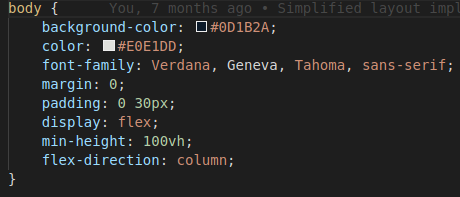
Variables - really useful for colours, I can put them all at the top to change the theme easily.
Before
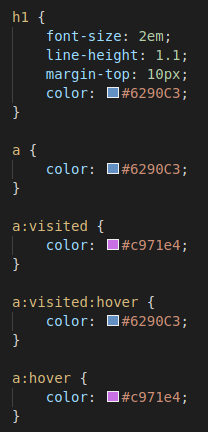 After
After
